
As the saying goes, “We all scream for ice cream!” My earliest and fondest childhood memories were around making ice milk floats at home, going to our local Baskin and Robbins, and meeting friends at a Fro Yo for a frozen yogurt topped full of cookie and candy bits.
By the time I was in college I’d left ice milk and other childhood treats like Baskin Robbins and Fro-Yo behind. I discovered super premium ice cream and I was on my way to becoming an ice cream snob. I snubbed my nose at standard brand ice creams that were pumped full of air. I became keenly aware of the rich and unique flavors in Super Premium ice creams like Haagen Dazs and Ben and Jerry’s. I also loved all the goodies already inside of these yummy pint sized ice creams.
Super Premium ice cream is characterized by a higher fat content, typically higher quality ingredients, and what’s called low overrun. Overrun is to the amount of expansion in ice cream that results from air being pumped into it during the freezing process. Standard ice cream is only about 10% fat content but it’s about 50% air.
Super Premium ice cream on the other hand typically has nearly twice the fat and ½ the air. Fat is flavor and less air means you get that melt-in-your-mouth creaminess that keeps you coming back for more.
My love of Super Premium ice cream led me to open 3 Ben and Jerry’s Scoop shops. For several years my days were spent running between my ice cream stores and making ice cream cakes. Many years later, I’m still an ice cream snob, and I still love making ice cream cakes.
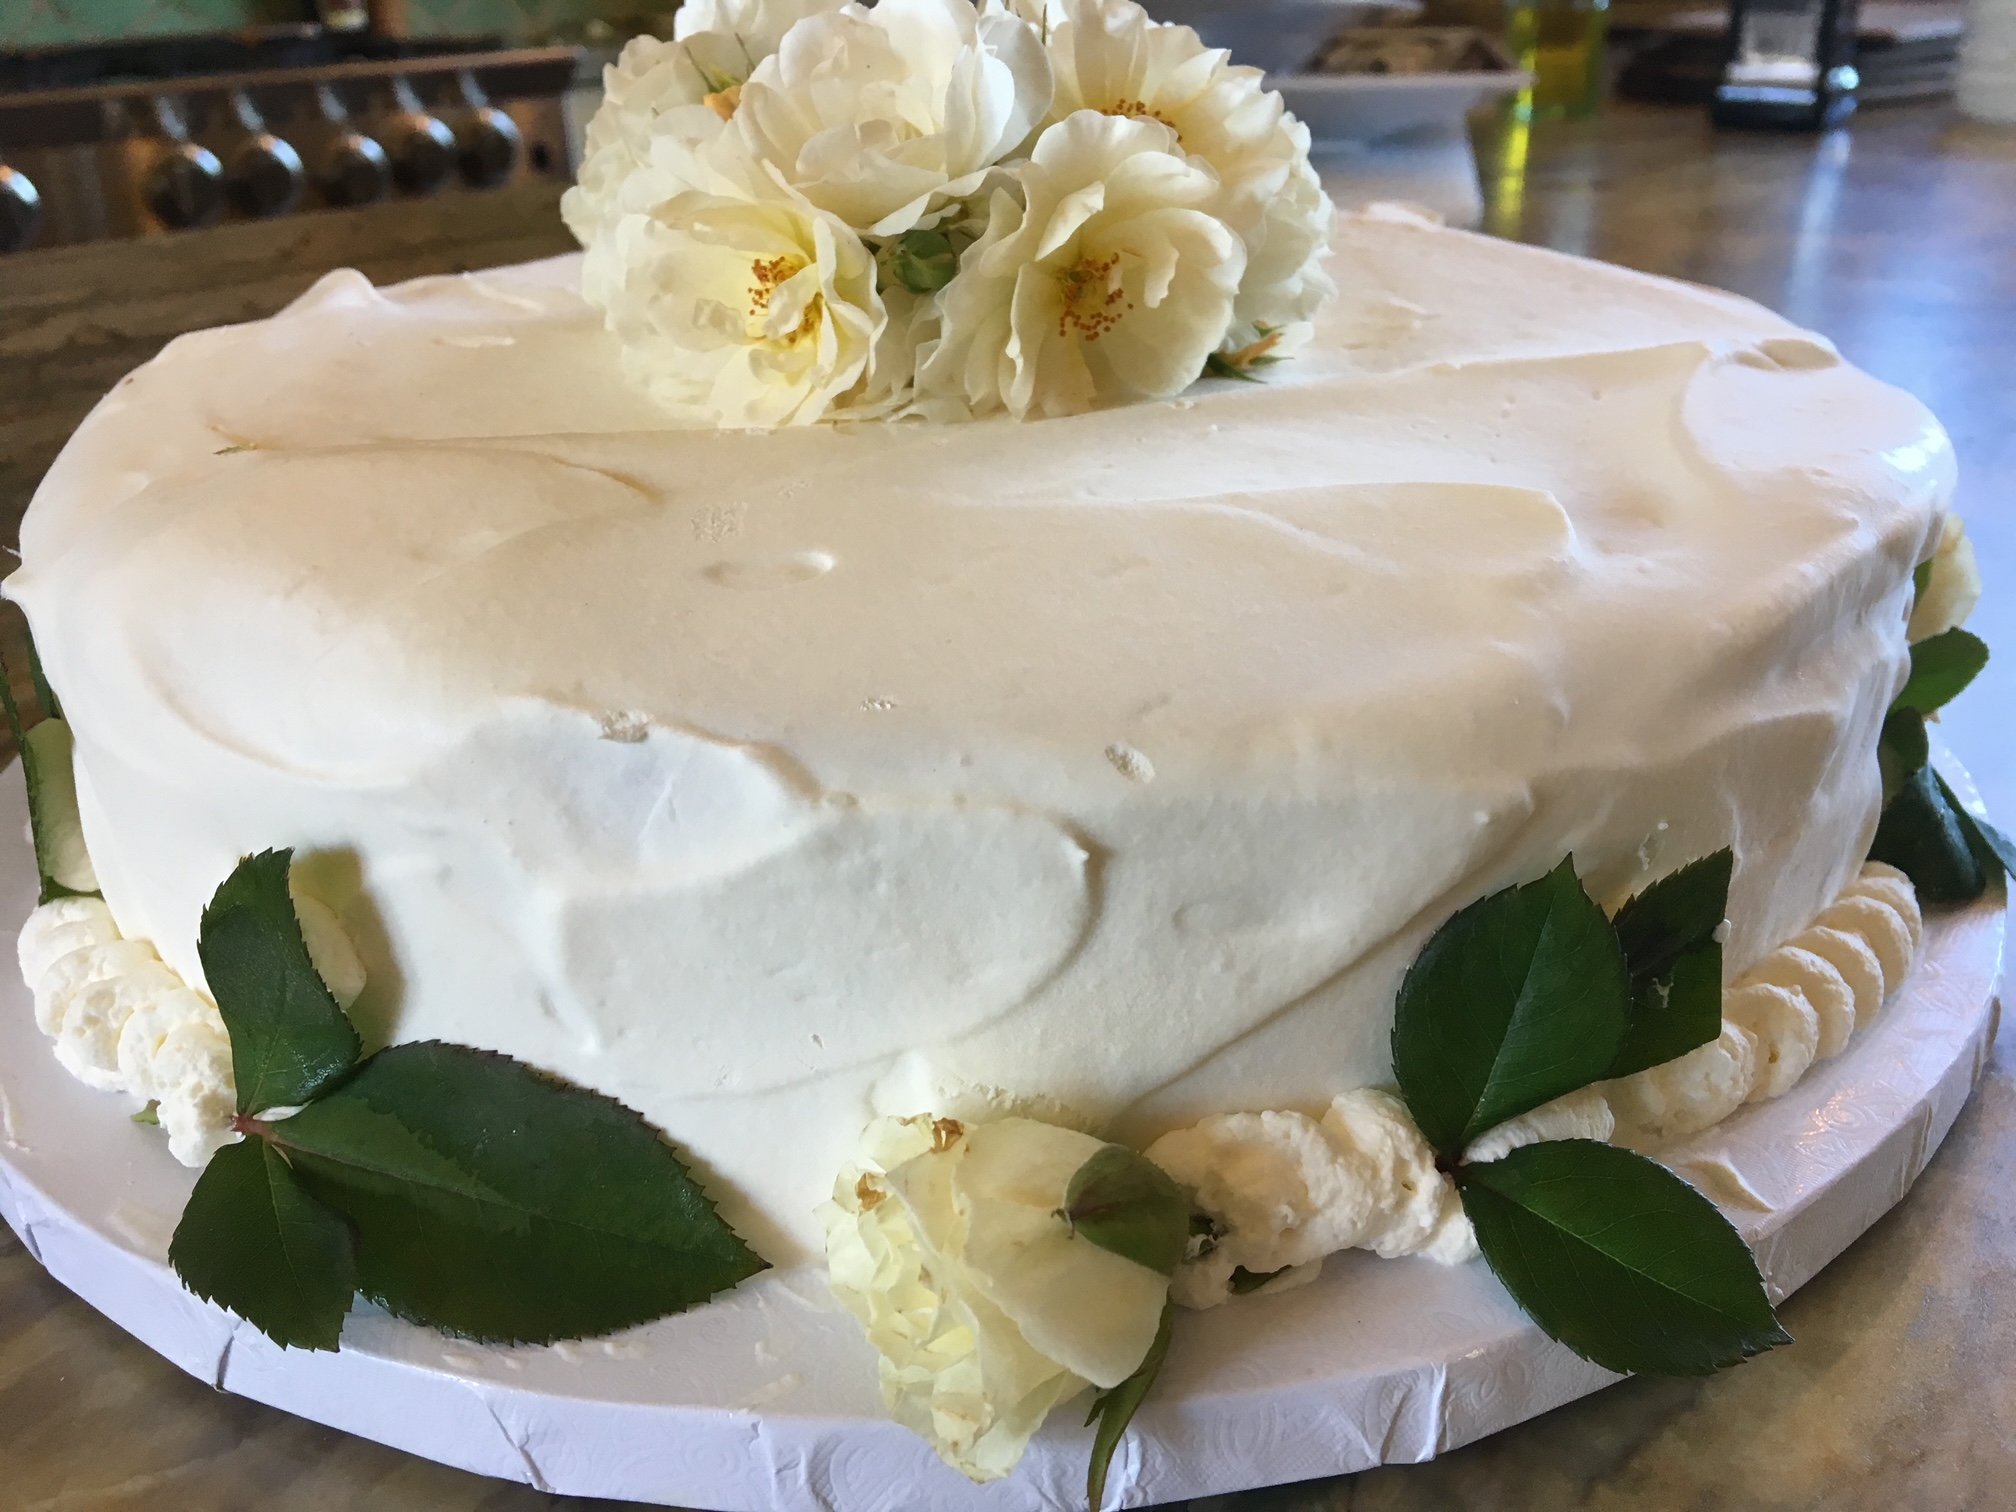
An ice cream cake is simply two layers of ice cream, held together with cookies, graham crackers, brownies, or any sweet crumbly bakery texture, then frosted with freshly whipped cream.
You’ll need to let the ice cream sit on the counter, or “temper” in the refrigerator to soften it up enough to scoop and spread the ice cream in your cake pan. Don’t use a microwave or melt the ice cream until it’s runny because it will take on a grainy consistency after being completely melted and refrozen..
You’re gonna love it!
Prep Time: 2-3 hours (includes set time in the freezer)
Serves: 8-10 Servings
Recipe Ingredients:
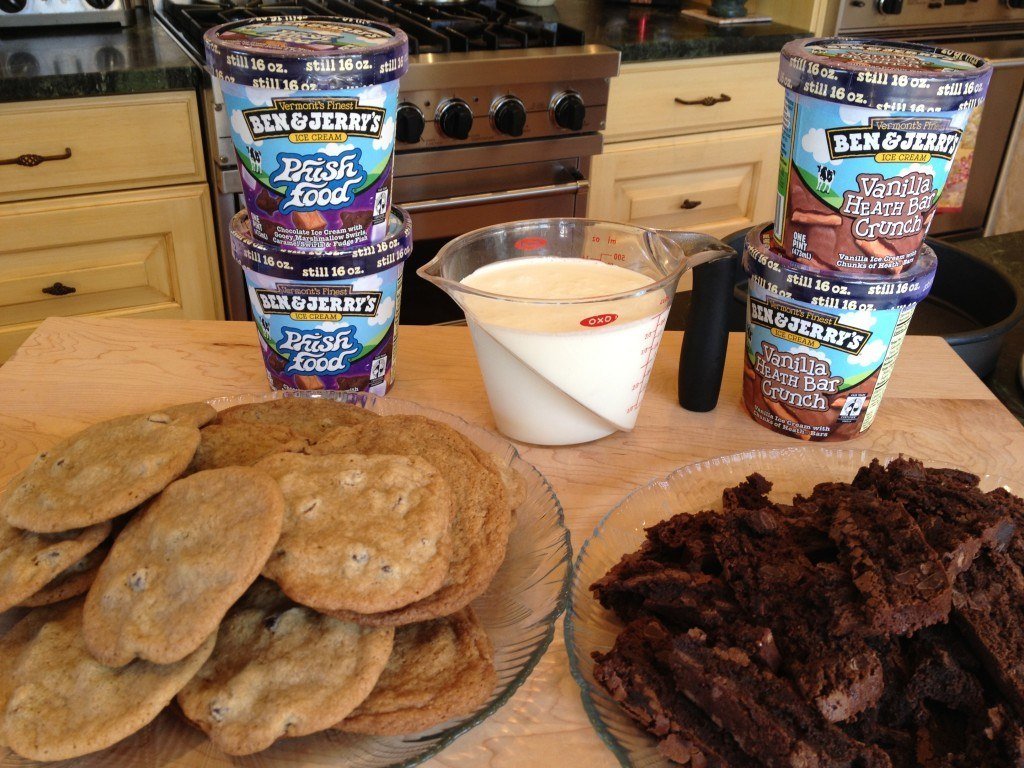
4 Pints of Ben & Jerry's ice cream (or your favorite super premium) ice creams. Two pints for each layer - so you can choose two different flavors, one for each layer.
Your favorite soft Chocolate Chip Cookies or Brownies (homemade, packaged, or other store bought cookie)
For Whipped Cream Frosting" (optional): 1 Pint of Heavy Whipping Cream, plus 1 tablespoon of powdered sugar
Note: A Springform pan is the easiest way to use to release the frozen cake from the pan, but you can also use a standard 9 inch cake pan. See instructions below for removing cake from pan.
Recipe Steps:
Create a base bakery layer of cookies or brownies on the bottom of your pan so that the bottom is completely covered. Break them apart or crumble/crush them as desired.
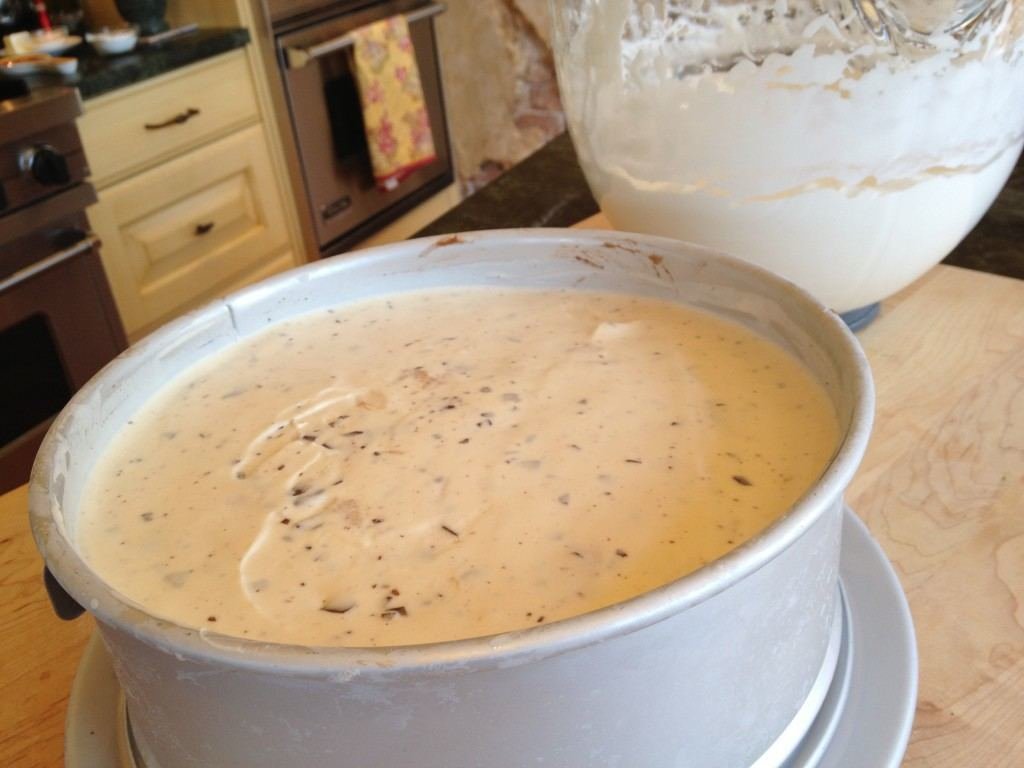
Spread 2 pints of softened ice cream over your bakery layer. Spread ice cream evenly over bakery layer and smooth it out flat.
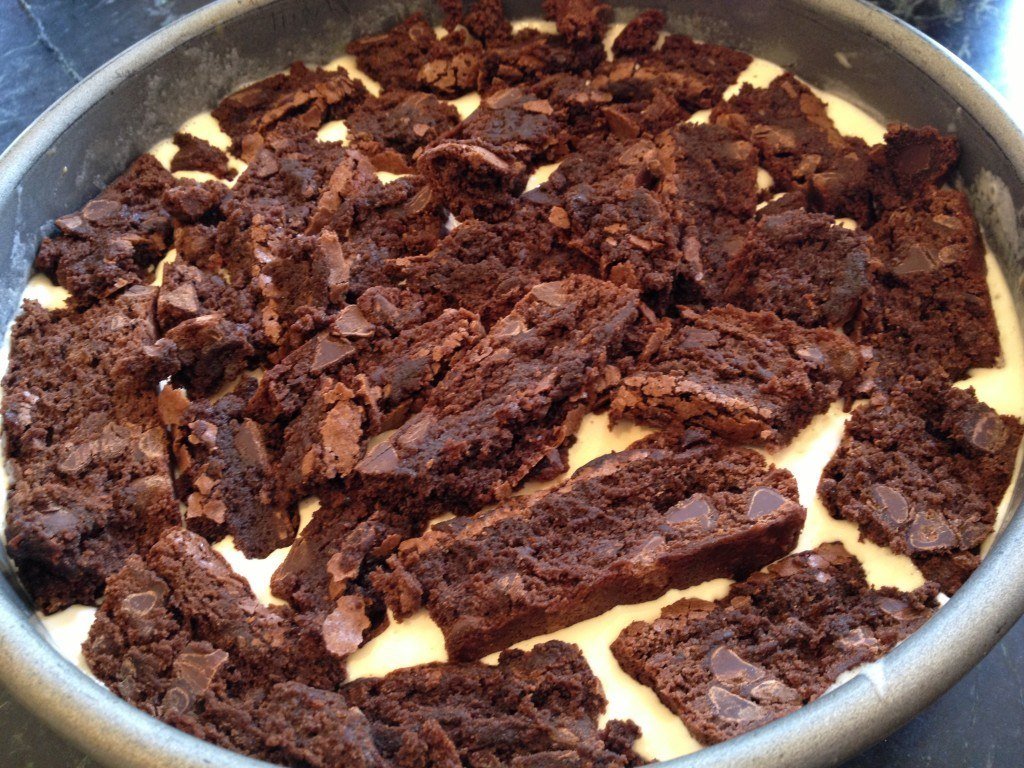
Add a second layer of bakery (cookies or brownies) over the first ice cream layer, ensuring the ice cream is completely covered.
Place in freezer to set until initial layers are frozen and hard enough to press a second layer of ice cream into the pan (45 minutes to an hour).
Remove from freezer and add two more pints of softened ice cream on top of second bakery layer. Return cake to freezer to set until completely frozen (45 minutes to an hour).
To prepare the whipped cream frosting, pour whipping cream into a stand-up mixer or medium sized bowl (if using a hand mixer). Whip cream on medium speed until cream begins to thicken. Add powdered sugar and turn speed up to high. Continue to blend until cream is whipped to stiff peaks. Stiff peaks that don't fall over when you lift beater(s) from cream.
Once the cake is fully frozen, release and remove the sides of the Springform pan. Smooth sides of cake with an offset spatula. If you’ve used a standard cake pan you’ll need to release the ice cream cake by turning the cake upside down and running hot water over the pan itself. Then letting the cake “fall” onto a serving plate. refreeze after this step and before frosting to ensure you cake is fully frozen.
Spread whipped cream frosting over top and sides of cake, and return to freezer to set one last time - about 20 minutes. If desired, you can also decorate with caramel or fudge sauce (in addition or instead of whipping cream).
To serve, let cake sit at room temperature for about 10 minutes before cutting/serving. You can make an ice cream cake 2-3 days in advance.